How to Photograph the Northern Lights
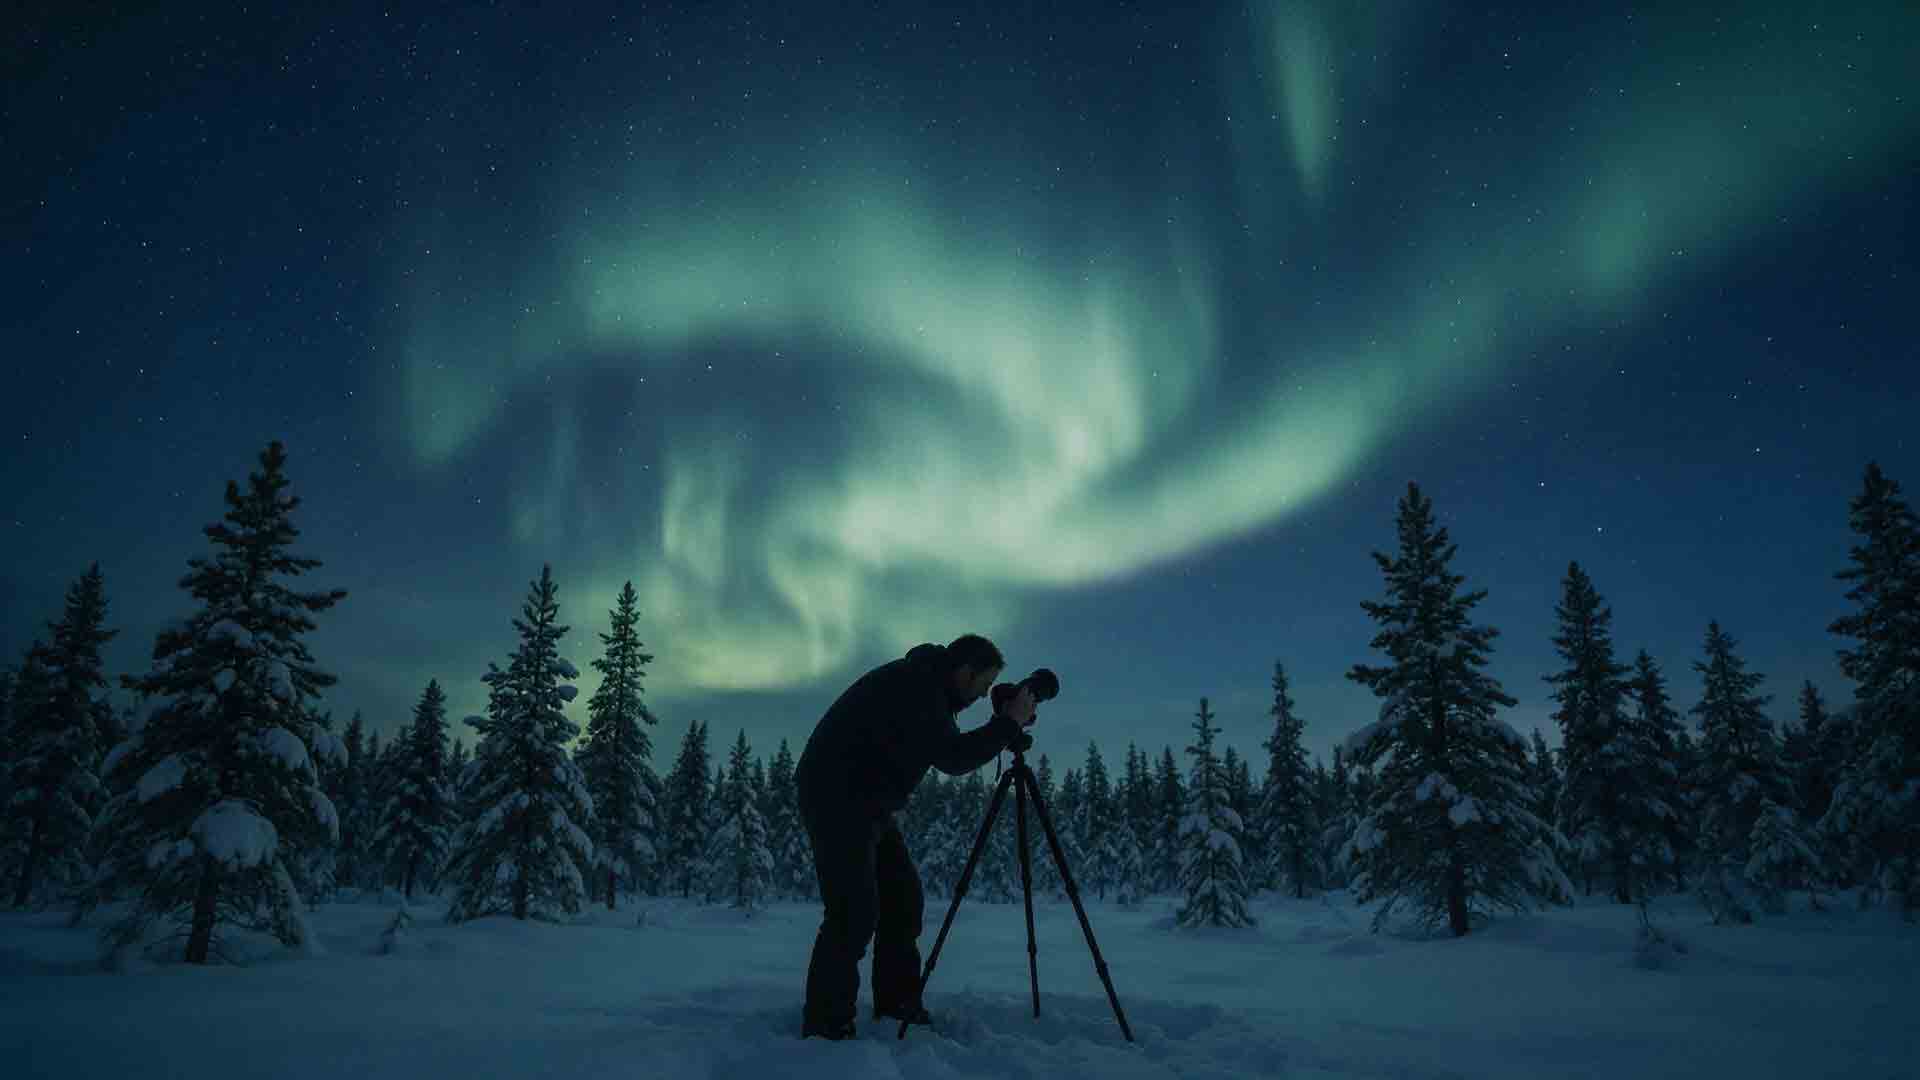
How to Photograph the Northern Lights
To photograph the Northern Lights, stabilize your camera, use manual exposure and manual focus, open the lens near its widest useful aperture, and begin around 2–8 seconds at ISO 1600–3200. Shorten the shutter when the aurora moves quickly, lengthen it when the display is faint, and review star sharpness and the individual color histograms whenever conditions change.
Key Takeaways
- Start with a tripod, RAW capture, manual focus, a wide aperture, a 2–8 second shutter speed, and ISO 1600–3200.
- Choose shutter speed according to aurora movement, not one universal “best” setting.
- Focus on a bright star using magnified live view; the infinity mark is only a rough reference.
- Check the green histogram as well as the overall histogram because auroral highlights can clip in one color channel first.
- A recent smartphone can capture the Northern Lights, but it should be supported securely and used without digital zoom.
This guide explains how to choose equipment, focus in darkness, adjust settings as the aurora changes, photograph the Northern Lights with a smartphone, compose a stronger scene, and diagnose common problems in the field.
Table of Contents
- What Equipment Do You Need?
- Which Camera Settings Should You Use?
- How Should Shutter Speed Change With Aurora Movement?
- How Do You Focus at Night?
- How Do You Photograph the Aurora Step by Step?
- How Do You Use a Smartphone?
- How Do You Troubleshoot Failed Photos?
- What Should You Pack?
- Frequently Asked Questions
Who Is This Guide For?
This guide is for beginners and intermediate photographers using a mirrorless camera, DSLR, compact camera with manual controls, or recent smartphone. It is also intended for travelers who may have only one clear aurora night and need a dependable process rather than a long list of disconnected settings.
The settings in this guide are starting ranges, not guaranteed formulas. Aurora brightness, movement, clouds, moonlight, snow, artificial light, focal length, lens aperture, and camera performance can all change the appropriate exposure.
This article does not rank specific camera models or claim that one exposure works for every aurora. Equipment suggestions are based on photographic requirements such as manual exposure control, stability, aperture, focal length, focusing control, battery life, and cold-weather usability.
The guide is based on photographic principles, published specifications, authoritative documentation, and practical decision criteria rather than hands-on testing of every camera and smartphone model.
What Equipment Do You Need to Photograph the Northern Lights?
A stable support and a camera that allows a multisecond exposure are the basic requirements. An expensive camera can improve image quality, but it cannot correct poor focus, tripod movement, an unsuitable shutter speed, or unsafe location planning.
Essential equipment
- A camera or smartphone capable of a multisecond exposure
- A stable tripod or secure phone support
- A wide or moderately wide lens
- Spare camera batteries or an external phone battery
- An empty memory card
- A clean microfiber lens cloth
- A headlamp with a red-light mode
- Warm, weather-appropriate clothing
- A safe navigation and return plan
NASA’s aurora photography guide recommends carrying extra batteries or a phone battery pack because cold temperatures can reduce available battery power. NASA also includes a tripod, warm layers, a red headlamp, food, and warm drinks among its practical preparations.
Helpful but optional equipment
- Remote shutter release
- Interval timer
- Lens hood
- Weather cover
- Thin liner gloves for camera operation
- Backup memory card
- Small weight for stabilizing a tripod
- Additional lens cloths for moisture or frost
A remote release is convenient but not essential. A two-second self-timer can prevent movement caused by pressing the shutter button.
Avoid hanging a heavy bag from a tripod when strong wind may cause it to swing. A weight that rests partly on the ground is less likely to introduce movement.
Which Camera Is Best for Northern Lights Photography?
The best camera is one that gives you reliable control over shutter speed, aperture, ISO, and focus. Larger sensors often provide cleaner high-ISO files, but sensor size alone does not determine whether an aurora photograph will succeed.
| Camera type | Main advantages | Main limitations | Best suited to |
|---|---|---|---|
| Mirrorless camera | Strong low-light capability, live-view magnification, interchangeable lenses | Electronic displays and cold weather may increase battery use | Most serious beginners and experienced photographers |
| DSLR | Good image quality, interchangeable lenses, often strong battery life | Older models may have slower live-view operation | Photographers who already own compatible equipment |
| Advanced compact camera | Portable and easy to carry | Smaller sensor or slower built-in lens on some models | Travelers minimizing equipment |
| Modern smartphone | Automatic Night mode, easy sharing, always available | Limited manual control and heavy computational processing | Casual images and unexpected displays |
| Action camera | Very wide view, compact size, useful time-lapse modes | Small sensor and limited still-image control on some models | Environmental views and time-lapse sequences |
A newer or more expensive camera does not automatically produce a better photograph. Knowing how to focus, recognize motion blur, protect highlights, and stabilize the camera is usually more valuable than upgrading equipment immediately.
Which Lens Is Best for Northern Lights Photography?
A wide-angle lens is the most flexible choice because it can include both the sky and a meaningful foreground.
On a full-frame camera, approximately 14–24mm works well for broad landscapes. A focal length around 24–35mm can show more detail in a smaller section of the sky. Equivalent focal lengths depend on sensor size.
An ultra-wide lens is not mandatory. A standard or short telephoto lens can produce strong photographs of distant curtains, rays, and auroral folds, but the narrower field of view makes framing more difficult as the display moves.
How wide should the aperture be?
Use a wide aperture when possible:
| Maximum aperture | Practical use |
|---|---|
| f/1.4–f/2 | Collects substantial light and supports short exposures, but focus and corner quality require careful checking |
| f/2.8 | A strong balance between brightness, availability, depth of field, and optical performance |
| f/4 | Usable for bright auroras, moonlit scenes, or longer exposures |
| Slower than f/4 | Still usable, but usually requires a longer shutter speed, higher ISO, or brighter display |
A kit lens can photograph the Northern Lights. Set it to its widest focal length and widest available aperture, then compensate with shutter speed and ISO.
Test a very fast lens both fully open and slightly stopped down. Some lenses improve noticeably at the edges when closed from f/1.4 to f/1.8 or f/2, while the light loss remains manageable.
What Are the Best Camera Settings for the Northern Lights?
There is no single correct exposure for every aurora. The most important variable is usually shutter speed because it determines whether moving rays remain defined or blend into a smooth area.
Use the following settings as starting points:
| Aurora condition | Starting shutter speed | Starting aperture | Starting ISO | Main objective |
|---|---|---|---|---|
| Bright, rapidly moving curtains | 0.5–2 seconds | f/1.4–f/2.8 | 1600–6400 | Preserve rays and fine movement |
| Active, moderately bright display | 2–5 seconds | f/1.8–f/2.8 | 1600–3200 | Balance structure, brightness, and noise |
| Faint or slowly moving arc | 5–15 seconds | Widest useful aperture | 1600–6400 | Gather enough light to define the arc |
| Very faint glow near the horizon | 10–25 seconds | Widest useful aperture | 3200–6400 or higher when necessary | Detect or document weak activity |
| Bright aurora over a moonlit landscape | 0.5–4 seconds | f/2–f/4 | 800–3200 | Protect auroral and foreground highlights |
Exposures near 20–25 seconds may produce visible star movement, especially with longer focal lengths or high-resolution cameras. They can also overexpose city glow, clouds, snow, or artificial foreground lights. Treat these longer exposures primarily as detection or documentation settings, not the default for preserving auroral structure.
Official manufacturer examples cover a wide range rather than one fixed formula. Nikon’s Northern Lights guidance includes photographs made with exposures of several seconds at wide apertures and elevated ISO settings. Canon’s Northern Lights guide similarly emphasizes manual control, a tripod, RAW capture, careful focusing, and settings that respond to the scene.
What Is a Reliable Baseline Exposure?
For an interchangeable-lens camera, begin with:
- f/2.8 or the widest useful aperture
- 4 seconds
- ISO 3200
- RAW or RAW+JPEG
- Manual exposure
- Manual focus
- Auto white balance or approximately 3500–4200 K
- Two-second self-timer or remote release
This is a diagnostic exposure, not a guaranteed finished setting. Take one photograph, enlarge a star and the edge of the aurora, and inspect the histograms before making the next adjustment.
Northern Lights Quick Start Card
Bright and fast aurora
- Shutter: 0.5–2 seconds
- Aperture: f/1.4–f/2.8
- ISO: 1600–6400
- Priority: Preserve rays and folds
Moderately active aurora
- Shutter: 2–5 seconds
- Aperture: f/1.8–f/2.8
- ISO: 1600–3200
- Priority: Balance detail and noise
Faint and slow aurora
- Shutter: 5–15 seconds
- Aperture: Widest useful setting
- ISO: 1600–6400
- Priority: Record enough signal
After every major change
- Enlarge a star and confirm focus.
- Check the overall histogram.
- Check the green histogram when available.
- Shorten the shutter if rays lose definition.
- Reduce exposure if colored highlights clip.
Save this card as a note or screenshot before leaving reliable mobile coverage.
How Should Shutter Speed Change With Aurora Movement?
Use shorter exposures for fast movement and longer exposures for faint, slow activity.
Shutter speed affects more than brightness. A long exposure averages everything that happens while the shutter is open. Fast vertical rays may become a featureless green region, even when the photograph is technically bright enough.
A short exposure preserves movement but records fewer photons. You may need to compensate with a wider aperture or higher ISO.
How Does the Motion–Brightness–Foreground Framework Work?
Evaluate three conditions before changing a setting:
- Motion: Are individual rays, curtains, or folds changing rapidly?
- Brightness: Is the aurora clearly visible, or is it only a faint arc?
- Foreground: Is the landscape dark, moonlit, snowy, or artificially illuminated?
Then choose the adjustment that addresses the actual problem:
| What you observe | First adjustment | Why |
|---|---|---|
| Aurora looks smeared | Shorten shutter speed | Preserves changing rays and folds |
| Aurora is sharp but the file appears too dark | Raise ISO cautiously | Brightens the recorded image signal without extending the exposure, but may increase visible noise and reduce highlight headroom |
| Aurora and stars are dark because little light was captured | Open the aperture or lengthen the exposure if motion allows | Collects more light at the sensor |
| Stars are sharp but the foreground is nearly black | Make a separate foreground exposure or wait for moonlight | One exposure may not suit both sky and land |
| Aurora loses texture in bright green areas | Shorten shutter speed or lower ISO | Protects color-channel highlight detail |
| Foreground lights clip before the aurora becomes visible | Recompose, shield the lens, or choose a darker position | Additional exposure may worsen the imbalance |
| Weak color appears only in a long test frame | Treat it as possible detection, then confirm with observation and forecast information | Cameras may record faint color that is difficult to see directly |
This framework prevents a common mistake: responding to every dark photograph by increasing ISO. ISO changes how the captured signal is amplified or encoded; it does not cause the sensor to collect more photons.
To capture more light, you must use a wider aperture, a longer exposure, a brighter scene, or a more light-efficient optical system. Raising ISO can make the recorded image appear brighter without increasing exposure time, but the tradeoff may include more visible noise and less highlight flexibility.
How Do You Calculate an Exposure Change?
Every doubling or halving of shutter time represents one stop. Every doubling or halving of ISO also represents one stop in the recorded brightness relationship.
Suppose your starting exposure is:
- 8 seconds
- f/2.8
- ISO 1600
The aurora develops fast vertical rays, and the 8-second photograph smears them. Reducing the shutter from 8 seconds to 2 seconds removes two stops:
- 8 to 4 seconds: one stop less
- 4 to 2 seconds: another stop less
To retain approximately similar image brightness without reopening the aperture, raise ISO by two stops:
- ISO 1600 to 3200: one stop
- ISO 3200 to 6400: another stop
The revised setting becomes:
- 2 seconds
- f/2.8
- ISO 6400
The shorter exposure collects one-quarter as much light as the 8-second exposure, but it may preserve much more auroral structure. The increased ISO does not replace the missing photons; it changes how the smaller captured signal is represented in the file.
The result may show more noise, but a sharp, structured aurora at ISO 6400 is often more useful than a cleaner photograph in which the movement has been averaged away.
How Do You Focus on the Northern Lights at Night?
Focus on a bright star, planet, or distant light before the strongest part of the display begins.
The aurora itself is not always a reliable focusing target because it moves and has soft, changing edges.
Step-by-step focusing method
- Set the lens and camera to manual focus.
- Aim toward a bright star, planet, or distant artificial light.
- Activate live view.
- Magnify the selected point as much as the camera allows.
- Rotate the focus ring slowly.
- Stop when the star appears smallest and most defined.
- Take a test photograph.
- Enlarge several stars in the recorded image.
- Refine focus if the stars appear soft or enlarged.
- Recheck focus after moving the tripod, changing lenses, or touching the focus ring.
Do not assume the printed infinity symbol gives perfect star focus. Lens design, temperature, manufacturing tolerances, and focus-by-wire behavior can place the sharpest position slightly away from the mark.
Nikon and Canon both recommend checking focus on the camera display and refining it rather than relying only on the infinity position.
What if no star is visible in live view?
Temporarily raise ISO or lengthen the preview exposure. Some cameras also provide a low-light display mode that brightens the live view without changing the final exposure.
Another option is to focus on a distant artificial light and then confirm the result on a star. Restore your intended exposure settings after focus is established.
Should you tape the focus ring?
A small piece of removable tape can help prevent an easily moved mechanical focus ring from shifting. Do not tape over controls, force a focus-by-wire ring, or apply adhesive that could damage the lens finish in cold conditions.
Check focus again even after taping. Temperature changes or accidental contact can still affect the result.
How Do You Photograph the Northern Lights Step by Step?
Step 1: Confirm That the Sky and Location Are Usable
An aurora forecast cannot overcome cloud, fog, daylight, blowing snow, unsafe roads, or restricted access.
Check:
- Cloud cover
- Local darkness
- Moon position
- Visibility
- Wind
- Temperature
- Road conditions
- Parking availability
- Public access rules
- Wildlife or environmental restrictions
The NOAA Space Weather Prediction Center Aurora Dashboard provides tonight and tomorrow-night visibility guidance, recent auroral activity, short-range estimates, and geomagnetic information.
NASA notes that the Kp index is useful as a broad measure of geomagnetic activity, but it is not a precise real-time timer for a specific location. Combine Kp with auroral maps, current solar-wind information, local clouds, darkness, and direct observation.
Step 2: Arrive Before the Strongest Activity
Reach the location while enough light remains to inspect the ground when possible. Identify ice, water, road edges, unstable snow, steep drops, fences, and access boundaries before concentrating on the sky.
Choose at least one composition and establish focus early. A fast-changing display may not leave time to learn unfamiliar camera menus.
Step 3: Stabilize the Camera
Extend the thickest tripod leg sections first and keep the center column low. In strong wind, lower the tripod and use your body as a windbreak without touching the camera during the exposure.
Press each tripod leg into firm ground. Snow that appears solid may settle after the camera is positioned.
Check the camera or lens manual before deciding whether to turn stabilization off. Some stabilization systems are designed to detect tripod use, while others may introduce movement when left active on a locked tripod.
Step 4: Enter the Baseline Settings
Start with:
- f/2.8
- 4 seconds
- ISO 3200
- RAW
- Manual exposure
- Manual focus
- Auto white balance or approximately 3800 K
- Two-second self-timer
Take one test frame before refining the composition.
Step 5: Capture a Three-Frame Decision Sequence
Use three exposures to learn what the current aurora requires:
- A short exposure that prioritizes motion
- A balanced baseline exposure
- A longer exposure that gathers more light
For example:
| Frame | Shutter | Aperture | ISO | Purpose |
|---|---|---|---|---|
| Motion frame | 1 second | f/2.8 | 6400 | Preserve fast rays |
| Baseline frame | 4 seconds | f/2.8 | 3200 | Evaluate overall balance |
| Light-gathering frame | 10 seconds | f/2.8 | 1600 | Reveal faint structure and foreground |
These three frames are not intended to have identical brightness. They are a fast diagnostic tool for comparing structure, noise, star movement, and foreground visibility.
This decision sequence is more useful than repeatedly changing random settings because each frame has a specific purpose.
Step 6: Inspect Focus and Color-Channel Highlights
Do not judge exposure only from the apparent brightness of the rear display. Screen brightness can make an underexposed photograph look acceptable in darkness.
Check:
- Star sharpness
- Fine edges in the aurora
- Foreground highlights
- Overall histogram
- Individual red, green, and blue histograms
- Highlight warnings when available
Nikon’s histogram guidance explains that separate RGB histograms show the intensity of the red, green, and blue channels. This matters for aurora photography because a bright green channel may clip even when the combined brightness display looks acceptable.
If the green graph is crowded against the right edge, shorten the exposure or lower ISO. Recovering clipped color detail later may be impossible.
Step 7: Adjust as the Aurora Changes
A setting that works during a faint arc may fail when the display suddenly develops bright moving curtains.
Use the following order:
- Adjust shutter speed for motion.
- Adjust aperture if additional light is needed and the lens allows it.
- Adjust ISO to place the captured signal at a practical brightness.
- Recheck the histogram.
- Recheck focus periodically.
Do not spend the entire display reviewing old photographs. Confirm that focus and exposure are usable, then continue shooting while watching the sky.
How Do You Compose a Strong Northern Lights Photograph?
The aurora attracts attention, but the foreground explains where the photograph was made and gives the sky a sense of scale.
Include a deliberate foreground
Useful foreground subjects include:
- Mountains
- Trees
- Cabins
- Lakes or coastlines
- Roads or paths
- Snow-covered terrain
- Simple building silhouettes
- A person standing still
Avoid including a large area of empty black foreground without visual purpose. Either use a recognizable silhouette, expose the foreground deliberately, or frame more tightly around the sky.
Leave space for the display to grow
A quiet arc near the horizon can expand rapidly. Begin with a slightly wider composition than seems necessary when activity is increasing.
Check the frame edges
Before beginning a sequence, scan all four edges for:
- Tripod legs
- Headlamp spill
- Parked vehicles
- Road signs
- Other photographers
- Cut-off buildings
- Bright lamps
- Lens flare
- Uneven horizon lines
Use reflections without taking unnecessary risks
Still water can produce a strong reflection, but the effect requires suitable wind and viewing geometry.
Do not walk onto unfamiliar ice, approach unstable shorelines, or cross barriers for a reflection. A less dramatic photograph from firm public ground is the better result.
Should You Include the Moon?
The Moon can help illuminate mountains, snow, buildings, or people, but it can also reduce contrast in a faint display.
Use moonlight when:
- The aurora is bright enough to compete with it.
- The landscape needs natural illumination.
- The Moon can be placed intentionally.
- Snow or terrain benefits from visible texture.
Recompose or shield the lens when:
- The aurora is weak.
- The Moon produces distracting flare.
- Snow or water clips before the aurora is adequately recorded.
- Strong moonlight washes out the desired section of sky.
A full Moon does not automatically ruin aurora photography. It changes the exposure balance and the visual character of the scene.
How Do You Photograph the Northern Lights With a Smartphone?
A recent smartphone can record auroral color and structure because its sensor and computational camera system can accumulate information over several moments.
NASA notes that digital cameras and smartphones may record faint auroras that are difficult to see clearly with the unaided eye.
Smartphone procedure
- Clean the camera lens.
- Place the phone on a tripod or secure, motionless support.
- Select the main rear camera, usually marked 1×.
- Turn off flash.
- Activate Night mode or the equivalent low-light mode.
- Avoid digital zoom.
- Use a timer, remote trigger, or voice control when available.
- Tap a bright star or distant light if the app allows focus selection.
- Reduce the exposure if the aurora becomes a featureless bright area.
- Capture several frames because automatic processing may vary.
Apple’s Night mode documentation recommends keeping the phone steady until capture is complete and using a secure surface or tripod to improve stability. Exposure controls, available lenses, RAW options, and maximum Night mode durations vary by phone and software version.
Which smartphone lens should you use?
Begin with the main rear camera. It commonly has a larger sensor, brighter lens, or stronger low-light processing than the ultra-wide camera, although this depends on the device.
Use the ultra-wide camera when the display fills much of the sky and the model produces acceptable low-light quality. Avoid digital zoom because it enlarges the image without collecting additional optical detail.
Smartphone strengths
- Easy to carry
- Minimal setup
- Automated image stacking
- Immediate sharing
- Good results during bright displays
- Useful for confirming faint color
Smartphone limitations
- Limited control over shutter timing
- Processing may smooth moving rays
- Noise reduction may remove stars
- Results vary substantially between models
- The preview may not represent the final processed file
- Cold weather can reduce battery performance
- Long Night mode captures are vulnerable to movement
Take more than one frame and inspect the final processed image before assuming the photograph succeeded.
How Do You Photograph a Person Under the Aurora?
A person introduces a second moving subject. The aurora changes during the exposure, and the person must remain still.
Use a shorter exposure when possible, ideally around one or two seconds during a bright display. Ask the subject to stand in a comfortable position with arms close to the body.
Use brief, controlled illumination rather than shining a powerful light continuously.
Safety and etiquette rules
- Do not aim lights toward roads, vehicles, or drivers.
- Do not shine lights into another photographer’s composition.
- Do not continuously illuminate wildlife.
- Check local rules before using strong lights in parks, reserves, or protected areas.
- Do not position a person on a road edge, unstable slope, unfamiliar ice, or slippery shoreline.
- Preserve everyone’s night vision by using the dimmest light that works.
- Obtain the subject’s consent before publishing an identifiable portrait.
If one frame cannot expose both the person and the aurora, capture separate exposures from the same locked tripod position.
Should You Use One Exposure or Blend Multiple Exposures?
A single exposure is the simplest and clearest representation of the scene. Begin with that approach whenever conditions allow.
An exposure blend can help when the bright, moving sky and dark foreground require incompatible shutter speeds.
Single exposure
Advantages
- Fast workflow
- Fewer editing decisions
- Natural relationship between sky and land
- Easy to describe accurately
- Less risk of alignment errors
Limitations
- Foreground may remain dark
- Artificial lights may clip
- One shutter speed may not suit both sky and land
- Foreground noise may become visible when shadows are lifted
Exposure blend
Advantages
- Better control over foreground detail
- Separate shutter speeds for land and sky
- Reduced need to lift severely underexposed shadows
- Greater flexibility in scenes with extreme brightness differences
Limitations
- Requires careful alignment
- Moving water, trees, clouds, and people complicate blending
- Can mislead viewers if the method is not disclosed
- Combining different locations or unrelated times changes the documentary meaning
A defensible blend uses frames captured from the same tripod position during the same scene.
A clear caption can read:
Exposure blend made from two frames captured from the same tripod position during the same scene: 2 seconds for the aurora and 20 seconds for the foreground.
If the sky was photographed at a different time, in a different direction, or at another location, the caption should state that clearly. A replaced sky should not be presented as a single documentary exposure.
What White Balance Should You Use?
White balance controls how the camera renders the green, blue, purple, red, snow, moonlight, and artificial illumination in the scene.
For RAW photography, Auto white balance is acceptable because color temperature can be adjusted later with greater flexibility. A manual setting around 3500–4200 K often produces a neutral-looking night scene, but there is no universal value.
The appropriate balance depends on:
- Moonlight
- Snow
- City glow
- Street lighting
- Clouds
- Camera color response
- Intended appearance
Avoid extreme adjustments that turn a weak pale arc into an implausibly saturated band. Color correction should clarify captured information rather than create an event that was not present.
How Should You Edit Northern Lights Photographs?
Edit in a sequence that protects highlights before aggressively lifting shadows.
Practical editing order
- Apply the correct lens profile.
- Correct chromatic aberration.
- Set white balance.
- Adjust overall exposure.
- Recover auroral highlights.
- Lift foreground shadows cautiously.
- Add moderate contrast.
- Adjust color selectively.
- Reduce color noise.
- Apply sharpening after noise reduction.
- Inspect the image at full size.
- Check for halos, banding, clipped colors, and unnatural transitions.
RAW files provide more flexibility than JPEG files for white balance, highlight recovery, and noise control. Canon’s official Northern Lights guidance recommends RAW capture for greater post-processing control.
What should you avoid?
Avoid:
- Turning a pale arc into an intensely saturated neon band
- Removing so much noise that stars and auroral texture disappear
- Lifting a black foreground until strong color blotches become visible
- Replacing the sky without disclosure
- Adding stars, meteors, or Milky Way detail without disclosure
- Combining unrelated places or times while presenting the result as one exposure
- Claiming that a long-exposure photograph exactly represents naked-eye brightness
A camera can show stronger color than a dark-adapted eye because the sensor accumulates light during the exposure. That difference does not automatically make the image dishonest, but photographers should understand and communicate it accurately.
What Are the Most Common Northern Lights Photography Mistakes?
Using a shutter speed that is too long
A 20- or 30-second exposure may brighten a faint arc, but it can erase fine detail in an active display.
Correction: Shorten the shutter and raise ISO cautiously when preserving movement matters more than minimizing noise.
Trusting the infinity mark
The printed infinity position may not provide precise star focus.
Correction: Magnify a bright star and focus manually.
Changing every setting at once
When shutter speed, aperture, ISO, focus, and composition all change together, it becomes difficult to identify why a photograph improved or failed.
Correction: Establish a usable baseline and change one major variable at a time.
Judging exposure only from the rear screen
A bright screen can make an underexposed photograph look acceptable.
Correction: Lower display brightness and inspect the histograms.
Checking only the combined histogram
The overall histogram may look safe while the green channel is clipped.
Correction: Review the RGB histograms when the camera provides them.
Photographing only the sky
A frame filled entirely with green may lack location, scale, and visual structure.
Correction: Add a deliberate foreground or use a tighter composition that emphasizes auroral detail.
Forgetting the lens surface
Frost, condensation, rain, snow, or fingerprints can soften every image.
Correction: Inspect the front element periodically with a dim light and carry multiple clean cloths.
Assuming high ISO collects more light
Raising ISO changes the recorded brightness relationship but does not increase the number of photons reaching the sensor.
Correction: Use aperture and shutter speed to control captured light, then choose ISO according to motion, highlight protection, and camera performance.
Remaining in an unsafe location
A dark roadside, unstable shoreline, frozen lake, steep slope, or closed property is not justified by a photograph.
Correction: Scout the location, park legally, follow access rules, and leave when weather, fatigue, or road conditions become unsafe.
How Do You Troubleshoot Failed Aurora Photos?
| Problem | Likely cause | Practical correction |
|---|---|---|
| Aurora is a featureless green blur | Shutter speed is too long | Shorten the exposure |
| Aurora is too dark | Too little light was captured or ISO is too low for the recorded signal | Open the aperture, lengthen the shutter if motion permits, or raise ISO cautiously |
| Stars look like soft circles | Incorrect focus, lens moisture, or vibration | Refocus on a star, clean the lens, and stabilize the camera |
| Stars form short lines | Long exposure, wind, or tripod movement | Shorten the shutter and improve support |
| Foreground is black | Sky exposure is too short for the land | Make a separate foreground exposure or use moonlight |
| Foreground is overexposed | Moonlight, snow, or artificial light is too bright | Lower ISO, shorten the exposure, or recompose |
| Green areas contain no texture | Green-channel highlights are clipped | Shorten the shutter or lower ISO |
| Image is extremely noisy | High ISO, underexposure, or heavy shadow lifting | Capture more light when motion allows and use moderate noise reduction |
| Phone image is blurry | The phone moved during Night mode | Use a tripod, timer, or secure surface |
| Phone image looks heavily smoothed | Computational processing averaged moving detail | Use a shorter Night mode setting or manual-capable app when supported |
| Camera pauses after every exposure | Long-exposure noise reduction or file processing | Review noise-reduction and processing settings |
| Lens fogs after entering a warm building | Condensation formed during rapid temperature change | Keep the camera protected and let it warm gradually |
| Aurora appears in the photo but not clearly to the eye | The display is faint and the camera accumulated light | Confirm direction, compare consecutive frames, and check current forecast information |
| Horizon glow does not change between frames | Light pollution or distant cloud illumination may be responsible | Compare shape, direction, movement, cloud maps, and aurora forecasts |
How Can You Distinguish a Faint Aurora From Light Pollution?
A faint aurora can resemble distant city glow, especially near the northern horizon.
Look for several clues:
- Aurora structure may change between consecutive frames.
- Rays or arcs may appear above the horizon rather than spreading evenly upward from a city.
- The glow may align with the current auroral oval.
- Light pollution often remains fixed in shape and direction.
- Low clouds may reflect city light and create orange, yellow, or gray patches.
- A camera may reveal green or red color, but color alone is not definitive.
Use repeated photographs rather than one isolated frame. A sequence showing changing structure provides stronger evidence than a single colored patch.
Do not label an uncertain glow as a confirmed aurora without considering clouds, artificial light, and forecast context.
What Should You Pack for an Aurora Photography Night?
Camera checklist
- Camera body or smartphone
- Wide-angle lens
- Tripod
- Phone clamp
- Charged batteries
- External battery
- Empty memory card
- Lens cloths
- Remote release
- Lens hood
- Weather cover
- Red headlamp
Personal safety checklist
- Insulated layers
- Warm gloves
- Suitable footwear
- Reflective item for roadside visibility
- Water and food
- Offline map
- Emergency contact plan
- Local road information
- Confirmed legal parking
- Confirmed public access
- Appropriate wildlife precautions
Before leaving the vehicle
- Confirm the route back.
- Check for ice, water, traffic, and unstable ground.
- Tell someone where you are going when entering a remote area.
- Keep access to warm shelter and emergency equipment.
- Do not stand in or immediately beside an active road.
- Confirm that the vehicle is not blocking a gate, snowplow route, or emergency access.
- Monitor temperature, fatigue, and changing weather.
What Is the Best Beginner Field Workflow?
Use this repeatable sequence:
- Check NOAA aurora information, local cloud cover, darkness, roads, and access.
- Reach the location before complete darkness when possible.
- Choose a safe composition.
- Focus on a bright star.
- Start at f/2.8, 4 seconds, and ISO 3200.
- Capture the three-frame decision sequence.
- Enlarge the stars and confirm focus.
- Check the overall and RGB histograms.
- Shorten the shutter when movement smears.
- Open the aperture or lengthen the shutter when more captured light is needed.
- Raise ISO only as much as the situation requires.
- Capture wide, medium, and detail compositions.
- Recheck focus after moving or touching the camera.
- Protect the equipment during temperature transitions.
- Leave when weather, fatigue, access, or road conditions become unsafe.
The purpose of this workflow is not to eliminate uncertainty. It reduces preventable failures while leaving room for the unpredictable behavior of the display.
Which Settings Should Different Photographers Try First?
First-time photographer with a kit lens
Use the widest focal length and widest aperture. Start around 5–10 seconds at ISO 3200, then shorten the shutter if the aurora loses structure.
Try the equipment you already own before assuming that a faster lens is necessary.
Photographer with an f/1.4–f/2 lens
Begin with a shorter exposure, such as 1–4 seconds, and moderate-to-high ISO. A fast lens gives you more freedom to preserve movement.
Inspect edge stars because some lenses show coma or softness when fully open.
Photographer under strong moonlight
Begin with a lower ISO and shorter shutter speed. Use the moonlit foreground as part of the composition instead of forcing the scene to look moonless.
Watch snow, water, and pale buildings for clipped highlights.
Smartphone photographer
Use Night mode, the main rear camera, a secure support, and a timer. Avoid flash and digital zoom.
Capture several frames because automated processing may produce different results even when the composition appears unchanged.
Mid-latitude observer
In the Northern Hemisphere, choose a clear northern horizon. A distant aurora may appear first as a low pale arc or unusual color recorded by the camera.
Use the camera as a detection aid, but compare the result with clouds, city glow, changing structure, and official aurora information.
What Should You Do on Your Next Aurora Night?
Prepare your location, composition, and focus before the display strengthens. Begin with a wide aperture, a several-second exposure, and moderate-to-high ISO, then let aurora movement determine the next adjustment.
A beginner should prioritize a sharp, safely captured photograph over perfect noise performance. A more experienced photographer can add shorter motion-preserving frames, separate foreground exposures, interval sequences, and clearly disclosed blends.
Remember the order:
- Protect safety.
- Confirm focus.
- Choose shutter speed for movement.
- Capture enough light.
- Protect the color highlights.
- Refine the composition.
Frequently Asked Questions
Can you photograph the Northern Lights without a tripod?
Yes, but the risk of blur is much higher. A bright aurora may be photographed handheld with a short exposure and effective stabilization, but a tripod or secure support produces more consistent results with both cameras and smartphones.
Is the 500 rule useful for Northern Lights photography?
Only as a rough upper limit for star movement. Aurora motion often requires a much shorter exposure than the 500 rule suggests, so the movement of the display should normally determine shutter speed.
Modern high-resolution cameras can reveal star movement sooner than simplified rules predict. Review the stars at high magnification rather than relying only on a formula.
Should you use autofocus?
Autofocus may work on a bright star, the Moon, or a distant light, but it can hunt in a dark sky. A reliable method is to focus once on a suitable target, verify the result, and then switch to manual focus so the camera does not refocus unexpectedly.
Does a full Moon ruin Northern Lights photographs?
No. A full Moon can illuminate the foreground and make shorter exposures possible. It can also reduce contrast in a faint aurora or produce lens flare, so its effect depends on aurora brightness, atmospheric clarity, Moon position, and composition.
Why does the aurora look brighter or more colorful in a photograph?
A multisecond exposure lets the camera accumulate light over time. Human night vision and camera sensors also respond to faint color differently, so a photograph may show stronger green or red than the observer perceived at one instant.
Should long-exposure noise reduction be enabled?
It can reduce certain forms of sensor noise, but many cameras become unavailable while recording a matching dark frame. Leave it off during rapidly changing activity when uninterrupted shooting matters. Consider enabling it later for slower scenes if the processing delay is acceptable.
Sources
- NASA’s Guide to Finding and Photographing Auroras — Aurora forecasting limits, camera sensitivity, batteries, tripods, warm clothing, safe location planning, and field preparation. Accessed August 3, 2026.
- NASA: Auroras — Scientific background on auroral light and the interaction of energetic particles with Earth’s atmosphere. Accessed August 3, 2026.
- NOAA Space Weather Prediction Center: Aurora Dashboard — Aurora view lines, recent activity, short-range estimates, Kp information, and forecast products. Accessed August 3, 2026.
- Nikon USA: Awesome Skies—Photographing the Northern Lights — Published exposure examples, lens selection, focusing, moonlight, and foreground techniques. Accessed August 3, 2026.
- Nikon USA: Learning How to Use Your Camera’s Histogram — Overall and RGB histogram interpretation. Accessed August 3, 2026.
- Canon Europe: How to Photograph the Northern Lights — Manual settings, tripod use, focusing, RAW capture, and practical shooting guidance. Accessed August 3, 2026.
- Apple Support: Use Night Mode on Your iPhone — Night mode operation, exposure duration, stability, secure support, and tripod guidance. Accessed August 3, 2026.
How This Article Was Prepared
This article separates published guidance from adjustable field recommendations. NASA and NOAA are used for aurora science, forecast interpretation, and viewing preparation. Camera-manufacturer documentation is used for focusing, histogram, RAW, Night mode, and equipment guidance.
The exposure tables, Motion–Brightness–Foreground framework, three-frame decision sequence, exposure-conversion example, troubleshooting table, and quick-start card are editorial tools created to organize established photographic principles into a repeatable field process. They are not presented as laboratory findings or results from testing every available camera.
No claim is made that ISO 3200, a four-second shutter speed, or any specific lens will guarantee a successful photograph. No camera, lens, smartphone, application, or accessory is ranked as universally best.
More from Aurora Forecasting & Viewing
How Far South Can the Northern Lights Be Seen?
The northern lights usually remain within high-latitude regions, but powerful geomagnetic storms can carry visible aurora surprisingly far south. This guide explains why there is no single worldwide southern boundary and shows how geomagnetic latitude, the auroral oval, Kp, storm intensity, emission altitude, darkness, cloud cover, and local light pollution affect what an observer may see. It examines NOAA’s generalized U.S. visibility examples for G1 through G5 storms, while clarifying that locations such as Alabama, Florida, and southern Texas represent rare historical possibilities rather than guaranteed forecast limits. Readers will also find an original four-gate decision framework, an auditable geometric viewing-distance example, regional viewing guidance, a practical checklist, and troubleshooting advice for distinguishing faint aurora from clouds or artificial sky glow. The article helps observers decide when a forecast justifies going outside or traveling to a safer, darker viewing site.
What Are the Best Conditions for Seeing the Northern Lights?
The best Northern Lights viewing conditions occur when geomagnetic activity, clear weather, darkness, and a suitable observing location align. This guide explains why the position of the auroral oval matters more than relying on a single Kp value and shows how cloud cover, twilight, light pollution, moonlight, atmospheric transparency, and horizon visibility affect what an observer can see. It introduces the Five-Gate Aurora Viewing Framework, a practical planning tool that evaluates aurora activity, clouds, darkness, location, and available viewing time without presenting the result as a guaranteed probability. Readers will also learn how to compare short- and long-range forecasts, convert UTC forecast periods, choose a safe dark-sky site, recognize faint aurora, and troubleshoot a promising forecast that produces no visible display. The article is based on guidance from NOAA, NASA, the University of Alaska Fairbanks, and the National Park Service.
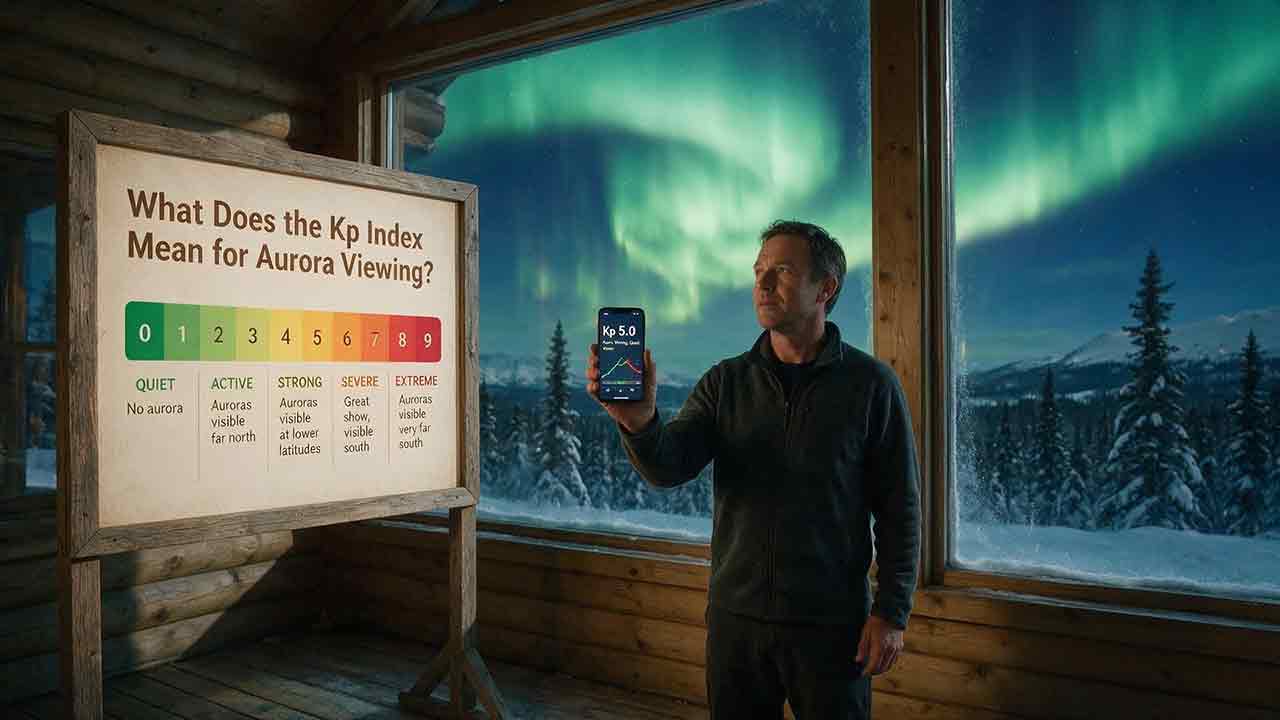
What Does the Kp Index Mean for Aurora Viewing?
The Kp index measures global geomagnetic activity on a scale from 0 to 9, but it is not a local aurora brightness score. This practical guide explains what different Kp levels mean, how NOAA’s G1–G5 storm categories relate to Kp, and why magnetic latitude, the auroral oval, cloud cover, darkness, and timing still determine whether the northern or southern lights are visible. Readers will learn how to interpret three-hour UTC forecasts, understand decimal and traditional Kp notation, and avoid common mistakes such as waiting for Kp 5 inside the normal auroral zone. The article also introduces the original Reach–Timing–Sky–Signal framework, a viewing decision matrix, troubleshooting guidance, and a pre-departure checklist. Using authoritative NOAA and GFZ documentation, it turns a global space-weather measurement into a realistic decision tool for travelers, photographers, high-latitude residents, and middle-latitude aurora watchers.
Explore More Topics
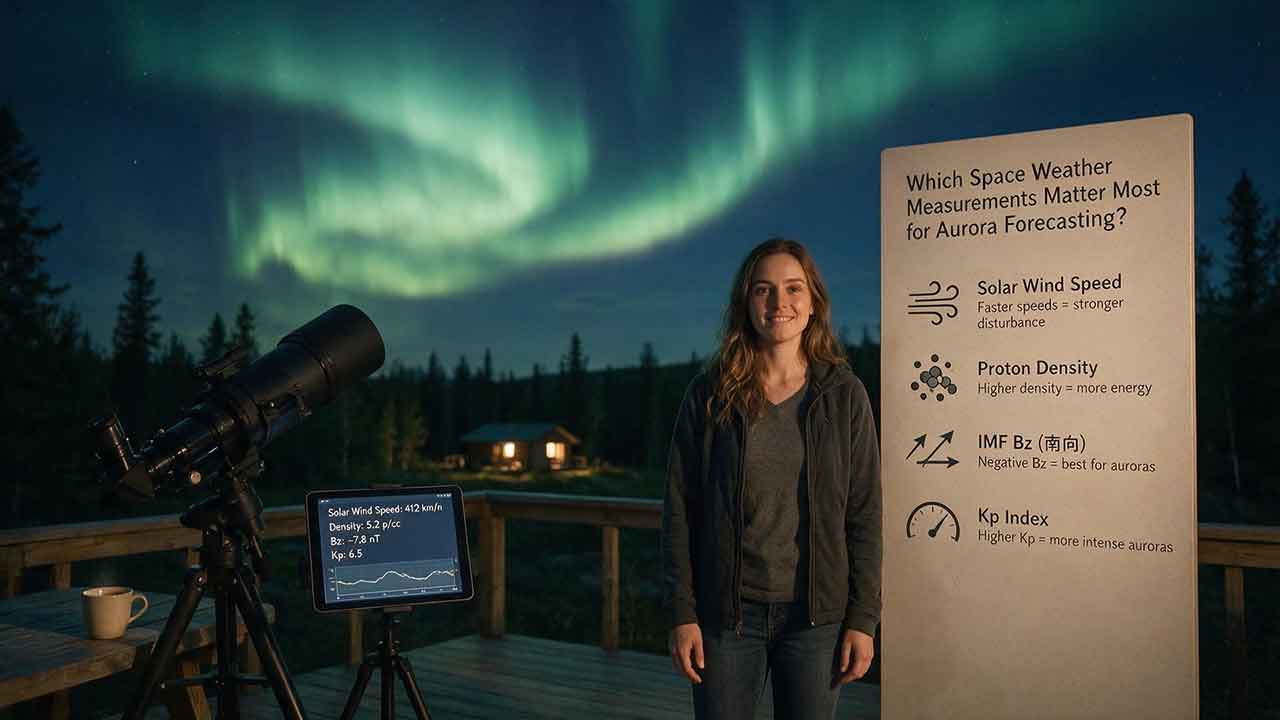
Which Space Weather Measurements Matter Most for Aurora Forecasting?
Aurora forecasting becomes more reliable when each space weather measurement is used for the right decision window. This guide explains why CME direction and propagation models matter several days ahead, while sustained southward Bz, total magnetic-field strength, solar-wind speed, density, and dynamic pressure become more useful as a disturbance approaches Earth. It also shows how Kp, auroral-oval maps, hemispheric power, AE, Dst, and local magnetometers answer different forecasting questions. Readers will learn a practical Signal–Coupling–Response–Visibility framework, compare upstream warning time with NOAA’s auroral-model guidance, work through a dynamic-pressure example, and troubleshoot conflicting forecast signals. The article also explains commonly overvalued indicators, including flare class, isolated Bz spikes, and Kp values without local-time context. Designed for aurora viewers, photographers, and travelers, it provides a clear checklist for combining official space weather data with darkness, cloud cover, road safety, and horizon visibility—without promising that any single measurement can guarantee a visible display.
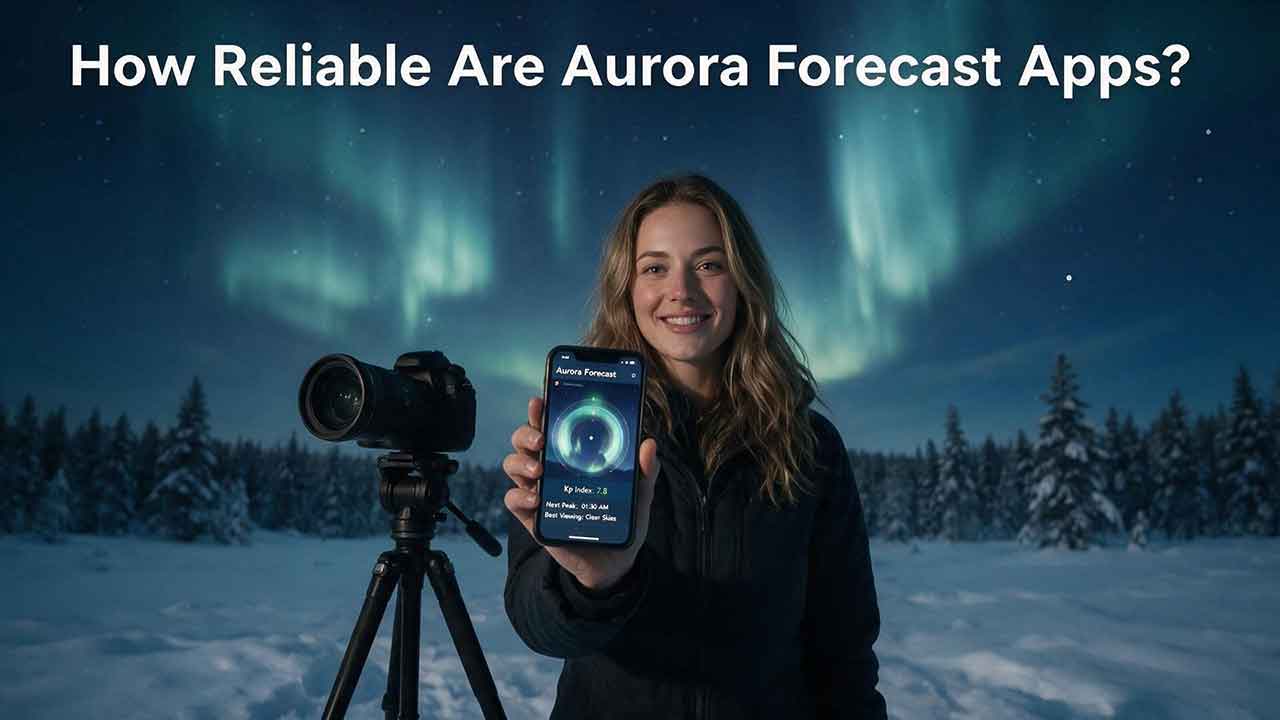
How Reliable Are Aurora Forecast Apps?
Aurora forecast apps are useful for identifying periods of elevated geomagnetic activity, but they cannot guarantee that the northern lights will be visible from a specific location at a specific time. This guide explains why app alerts sometimes disagree, how forecast reliability changes as an event approaches, and which measurements deserve the most attention. Readers will learn how to interpret the auroral oval, observed and forecast Kp, solar-wind speed, Bz, cloud cover, darkness, timestamps, and official space-weather alerts. The article also introduces the Signal-to-Sky Reliability Framework, a viewing-location comparison tool, and a transparent method for auditing app notifications without inventing accuracy claims. Practical tables, troubleshooting guidance, and a step-by-step verification process help casual observers, photographers, travelers, and lower-latitude aurora chasers decide when an alert is worth acting on. The guide is based on authoritative documentation and published research rather than hands-on commercial app rankings.
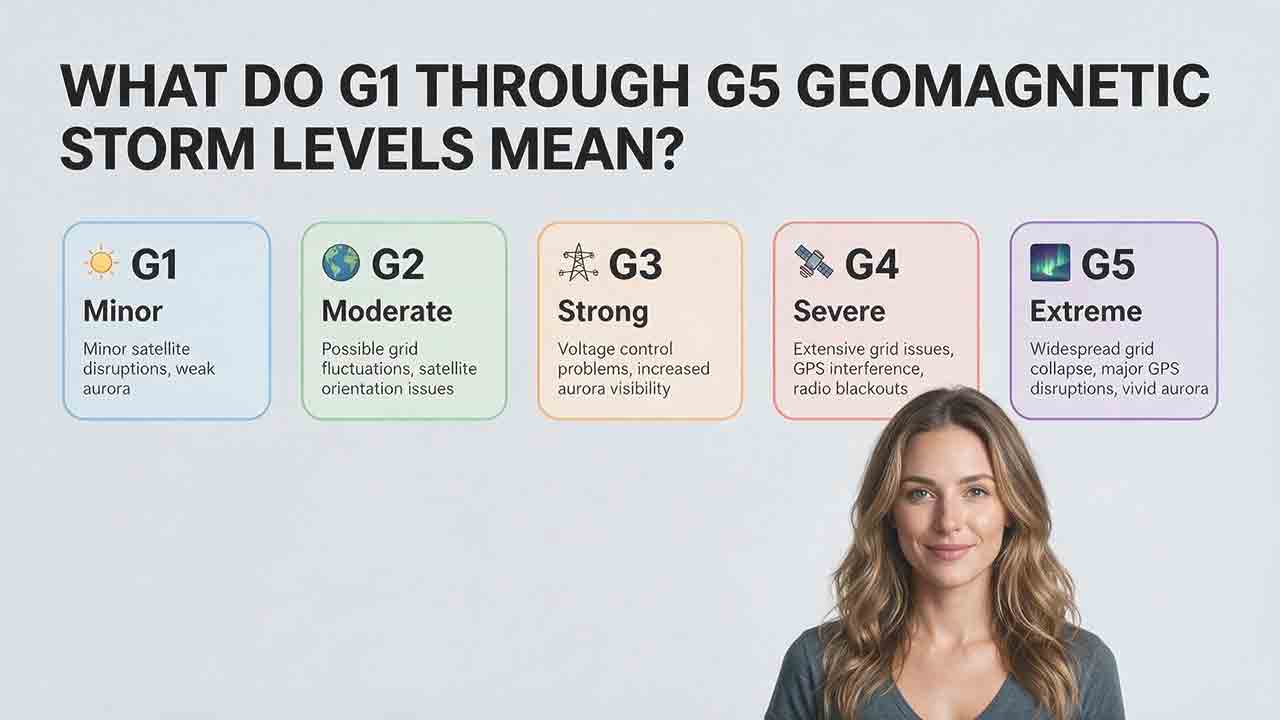
What Do G1 Through G5 Geomagnetic Storm Levels Mean?
NOAA’s G1 through G5 scale ranks geomagnetic storms from minor to extreme and translates planetary Kp measurements into practical impact categories. This guide explains the exact relationship between G levels and Kp notation, including why Kp 9− remains G4 while only Kp 9o qualifies as G5. It compares the possible effects of each level on aurora visibility, power systems, satellites, high-frequency radio, GPS, and precision navigation without treating those outcomes as guaranteed. Readers also learn how to distinguish a forecast, watch, warning, and observed alert; convert UTC forecast windows; interpret decimal Kp values such as 4.67 and 8.67; and apply the Scale–Status–Window–Location–System framework. Practical tables, a G3 watch example, common mistakes, and user-specific recommendations help the public, aurora observers, and technical users respond appropriately without unnecessary alarm.